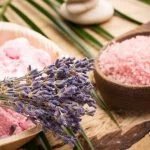
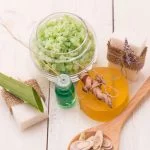
Are you interested in learning how to make homemade aromatherapy soap? Aromatherapy soap is not only a great way to cleanse the skin, but it also provides therapeutic benefits through the use of essential oils. In this article, we will explore the process of making your own aromatherapy soap, from choosing the right scents to presenting your creation as a thoughtful homemade gift.
Aromatherapy soap offers a range of benefits beyond just cleansing. The use of essential oils in these soaps can provide relaxation, stress relief, and even help with specific skin conditions. By creating your own homemade aromatherapy soap, you can customize the scents and ingredients to best suit your needs and preferences.
In the following sections, we’ll discuss everything you need to know about making homemade aromatherapy soap, including selecting the right essential oils, gathering the necessary ingredients and supplies, step-by-step instructions for creating your own soap recipe, and tips for enjoying the benefits of your handmade creation. Whether you’re new to soap-making or an experienced crafter looking to explore new techniques, making aromatherapy soap at home can be a rewarding and enjoyable project.
Essential Oils
When making homemade aromatherapy soap, one of the most important elements to consider is the choice of essential oils. The right scents can provide a range of benefits, from relaxation and stress relief to invigoration and mental clarity. With countless options available, it’s important to consider both the therapeutic properties and personal preferences when choosing essential oils for your homemade soap.
When selecting essential oils for your aromatherapy soap, it’s essential to consider their individual properties and benefits. For example, lavender oil is known for its calming and relaxing effects, making it an ideal choice for a soothing bedtime soap. On the other hand, citrus oils like lemon or orange can provide an uplifting and energizing experience, perfect for a morning pick-me-up in the shower.
In addition to considering the therapeutic benefits of essential oils, it’s important to choose scents that you personally enjoy. Experimenting with different combinations of essential oils can be a fun and creative process that allows you to customize your homemade soap to suit your own preferences. Whether you prefer floral, herbal, or woodsy scents, there are endless possibilities for creating a unique aromatherapy experience with your homemade soap using the right combination of essential oils.
Ingredients and Supplies
Making your own homemade aromatherapy soap can be a fun and satisfying project. To get started, you’ll need to gather the necessary ingredients and supplies. Here’s a list of what you’ll need before you begin:
1. Soap base: You can choose from a variety of soap bases such as glycerin, coconut oil, shea butter, or olive oil. Each type of soap base has its own unique properties and benefits, so consider the skin type and preferences of the person who will use the soap.
2. Essential oils: Essential oils are key to creating aromatherapy soap. Choose scents that promote relaxation, rejuvenation, or any other mood you want to evoke. Some popular choices include lavender for calming, peppermint for energy, and citrus for uplifting.
3. Colorants: If you want to add color to your soap, natural colorants such as turmeric powder, cocoa powder, or spirulina can be used. These options allow you to avoid artificial dyes and create beautiful hues in your soap.
4. Molds: You’ll need molds to shape your homemade soap into bars or other decorative forms. Silicone molds are a popular choice because they are flexible and easy to remove the finished soap from.
5. Mixing tools: Gather utensils like mixing bowls, spoons or spatulas, and a hand blender for blending the ingredients together. It’s important to have dedicated tools for soap-making to avoid cross-contamination with food items.
6. Safety equipment: Since you’ll be working with lye (sodium hydroxide) when using some types of soap bases, it’s crucial to have safety gear like gloves and goggles on hand.
By having these ingredients and supplies ready before starting your aromatherapy soap-making project, you’ll be well-prepared to create beautiful and personalized soaps that offer both aesthetic charm and therapeutic benefits.
| Ingredients | Supplies |
|---|---|
| Soap base | Molds |
| Essential oils | Mixing tools |
| Colorants | Safety equipment |
Step-by-Step Instructions
If you’re ready to start making your own aromatherapy soap, here’s a simple step-by-step guide to help you create the perfect recipe:
- Gather your ingredients and supplies. You will need a melt-and-pour soap base, essential oils of your choice, natural colorants (such as dried herbs or clays), a heat-proof container for melting the soap base, a stirring utensil, and soap molds.
- Begin by cutting the melt-and-pour soap base into small chunks and placing them in the heat-proof container. Melt the soap base in the microwave or using a double boiler on the stove, stirring occasionally to ensure that it melts evenly.
- Once the soap base is melted, let it cool slightly before adding your chosen essential oils. Be sure to research the dilution rates for each oil to ensure safe usage. Stir the essential oils into the melted soap base until thoroughly combined.
- If you want to add natural colorants or texture elements to your soap, now is the time to do so. For example, you can add dried lavender flowers for texture and color or turmeric powder for a golden hue.
- Carefully pour the scented and colored soap mixture into your chosen molds. Tap the molds gently on a flat surface to release any air bubbles and smooth out the top of the soap.
- Allow the soap to cool and harden completely in the molds before removing them. This can take several hours, depending on the size and depth of your molds.
- Once your aromatherapy soaps have set, carefully remove them from their molds and allow them to cure for an additional 24-48 hours before using or gifting them.
Making homemade aromatherapy soap can be a fun and creative way to enjoy all-natural skincare products while reaping the benefits of essential oils like lavender, peppermint, or eucalyptus for relaxation or revitalization in daily life.
Adding Color and Texture
When creating homemade aromatherapy soap, adding color and texture with natural elements can take your creation to the next level. By incorporating natural ingredients, you can create a visually stunning and sensorially pleasing soap that enhances the aromatherapy experience.
Choosing Natural Colorants
There are many natural options for adding color to your soap, such as herbs, clays, and botanical powders. For example, turmeric can add a beautiful golden hue to your soap, while spirulina can create a vibrant green color. Consider the scent of your essential oils when choosing natural colorants to ensure that they complement each other.
Adding Texture With Exfoliants
In addition to adding color, you can also include natural exfoliants in your aromatherapy soap for added texture. Common exfoliants like ground oatmeal, coffee grounds, or poppy seeds not only provide a gentle scrubbing action but also contribute to the overall appearance of the soap.
Incorporating Botanicals for Decoration
Dried flowers and botanicals not only enhance the visual appeal of your aromatherapy soap but also add an extra layer of sensory delight. Consider sprinkling petals on top of the soap before it sets or embedding them within the bar for a beautiful and natural touch. Just be sure to choose dried botanicals that won’t wilt or discolor over time.
By utilizing these natural elements, you can elevate the appearance and sensory experience of your homemade aromatherapy soap. The combination of colors, textures, and botanical additions will make your creation both visually appealing and beneficial for a holistic approach to self-care.
Molding and Curing
After you have poured your homemade aromatherapy soap into the molds, it’s time to allow it to set and cure. This step is crucial in ensuring that your soap is firm and lasts longer when used. Here are some instructions on how to properly mold and cure your homemade soap:
1. Choose the right molds: Selecting the right molds for your homemade aromatherapy soap is essential for achieving the desired shape and size. Silicone molds are a popular choice as they are easy to work with and can be easily removed once the soap has set.
2. Allowing the soap to set: Once you have poured the soap into the molds, cover them with a towel or piece of cardboard to insulate them. Let the soap sit undisturbed for 24-48 hours to allow it to set completely.
3. Curing the soap: After the initial setting period, remove the soap from the molds and place them on a rack in a well-ventilated area. Allow the soap to cure for 4-6 weeks before using it. This curing process helps to harden the soap further and allows excess water to evaporate, resulting in a longer-lasting bar.
By following these molding and curing steps, you can ensure that your homemade aromatherapy soap sets properly and is ready for use. Don’t rush this important step in soap making, as proper curing will significantly enhance the quality and longevity of your handmade creation.
Remember that patience is key when it comes to making homemade aromatherapy soap. Taking your time during this molding and curing process will result in a high-quality product that both you and others can enjoy for weeks to come.
Packaging and Presentation
When it comes to gifting your homemade aromatherapy soap, presentation is key. You want the recipient to feel special and pampered when receiving your thoughtful gift. One idea for packaging your soap is to use simple, yet elegant materials such as tissue paper, ribbon, or twine. You can also opt for eco-friendly packaging options like reusable cloth bags or recycled paper boxes.
Another way to present your aromatherapy soap as a homemade gift is by adding a personalized touch. Consider creating custom labels with the name of the scent and any special messages or instructions for use. This not only adds a professional look to your handmade soap but also shows the recipient that you put thought and care into making the gift.
If you’re feeling crafty, consider creating a DIY gift basket with your homemade aromatherapy soap as the centerpiece. Add other spa-related items like bath bombs, lotion bars, or candles to complete the package. This creates a beautiful and cohesive gift set that anyone would be thrilled to receive.
From packaging in an environmentally friendly way to creating a personalized touch, there are many creative ways to present your aromatherapy soap as a homemade gift. The extra effort you put into the presentation will surely be appreciated by the lucky recipients.
| Packaging Ideas | Personalization Options |
|---|---|
| Tissue paper, ribbon, eco-friendly packaging | Custom labels with scent name and messages |
| Reusable cloth bags or recycled paper boxes | DIY gift basket with other spa-related items |
Using Aromatherapy Soap
Understanding Aromatherapy
Aromatherapy is a holistic healing treatment that uses natural plant extracts to promote health and well-being. When using aromatherapy soap, it’s important to understand the different essential oils and their unique properties. Lavender, for example, is known for its calming and relaxing effects, while citrus oils like lemon and orange can uplift and energize the mind and body. By knowing the benefits of each essential oil, you can tailor your homemade aromatherapy soap to meet your specific needs.
Incorporating Aromatherapy Into Your Daily Routine
One of the best ways to enjoy the benefits of your homemade aromatherapy soap is to incorporate it into your daily routine. Whether it’s starting your day with an invigorating citrus-scented soap in the shower or winding down at night with a calming lavender-infused bar, finding moments throughout the day to indulge in aromatherapy can enhance your overall well-being.
You can also place a bar of aromatherapy soap in your linen closet or dresser drawers to infuse your clothes with a pleasant scent.
Caring for Your Skin
In addition to providing therapeutic benefits through aromatherapy, homemade soaps made with natural ingredients can also nourish and hydrate the skin. Unlike commercial soaps that often contain harsh chemicals, homemade aromatherapy soaps are gentle on the skin and can help improve its texture and appearance. Ensure that you keep your skin moisturized after using aromatherapy soaps by applying a natural lotion or body oil to lock in moisture and maintain soft, supple skin.
By following these tips, you can fully enjoy the benefits of using your own homemade aromatherapy soap while enhancing your overall well-being.
Conclusion
In conclusion, creating your own homemade aromatherapy soap can be a rewarding and enjoyable experience. Not only does it allow you to customize the scents and ingredients to suit your preferences, but it also provides an opportunity for self-expression and creativity. By choosing the right essential oils, ingredients, and natural elements, you can craft a unique and personalized product that promotes wellness and relaxation.
Learning how to make homemade aromatherapy soap is a valuable skill that can be shared with others. Whether you plan to give your creations as thoughtful gifts or use them for personal use, the process of packaging and presenting your handmade soap adds an extra touch of care and thoughtfulness. Additionally, by incorporating tips for using aromatherapy soap effectively, you can enhance the overall experience for yourself and those who receive your homemade creations.
Overall, embracing the art of making aromatherapy soap at home opens up a world of possibilities for self-care and creativity. The benefits of aromatherapy combined with the satisfaction of crafting something with your own hands make this a worthwhile endeavor for anyone interested in holistic wellness and natural living. With the right knowledge and techniques, you can enjoy the therapeutic effects of essential oils while delighting in the art of soap-making.
Frequently Asked Questions
How Do You Make Aromatherapy Soap?
Aromatherapy soap can be made by adding essential oils to a base of melted, unscented soap. Once the essential oils are mixed in, the soap is poured into molds and allowed to cool and harden.
How Do You Make Aromatherapy Liquid Soap?
Making aromatherapy liquid soap involves mixing liquid castile soap with essential oils. The scent should be added gradually, testing as you go until the desired strength is reached. The liquid soap can then be stored in a pump dispenser for use.
What Are the Best Essential Oils for Homemade Soap?
The best essential oils for homemade soap will depend on personal preference and the desired benefits. Popular choices include lavender for relaxation, peppermint for invigoration, tea tree for its antibacterial properties, and citrus oils for a fresh, uplifting scent. Experimentation is key to finding the perfect combination for your homemade soap.

Are you looking for a natural way to improve your health and wellbeing?
If so, aromatherapy may be the answer for you.
