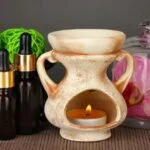
Aromatherapy bath bombs have gained popularity in recent years as people search for ways to enhance their bathing experiences. By infusing essential oils into these delightful fizzing treats, you can create a truly indulgent and therapeutic bath time ritual. In this article, we will explore the benefits of aromatherapy and how using bath bombs infused with essential oils can elevate your self-care routine to new heights.
Aromatherapy is the practice of using natural plant extracts, known as essential oils, to promote physical and mental well-being. These oils are derived from various parts of plants, including flowers, leaves, and roots, and each oil carries its own unique aroma and therapeutic properties. When added to bath bombs, these essential oils release their fragrance upon contact with water, creating a sensory experience that not only pleases the senses but also provides a range of benefits.
Bath bombs containing essential oils offer a multitude of advantages for both mind and body. Certain scents can help relieve stress and anxiety, promoting relaxation and calmness during your soak in the tub. Others may have invigorating or uplifting effects, helping to revitalize both your energy levels and mood. In addition to their aromatic qualities, these bath bombs also often contain moisturizing ingredients that nourish the skin while you bathe.
By incorporating aromatherapy into your bathing routine with homemade bath bombs infused with essential oils, you can transform an ordinary soak into a luxurious spa-like experience that caters to your specific needs. In the following sections, we will guide you through the process of making these delightful fizzing treats step-by-step so that you can harness the power of aromatherapy in your own home.
The Basic Ingredients and Tools Needed
Essential Ingredients
To make aromatherapy bath bombs, you will need a few essential ingredients that create the fizzing and soothing effect. The basic ingredients include baking soda, citric acid, Epsom salt, cornstarch, and cream of tartar. Baking soda acts as a natural cleanser for the skin and helps to neutralize odors. Citric acid provides the effervescent effect when combined with water.
Epsom salt is known for its relaxing properties and can help soothe sore muscles. Cornstarch adds a silky texture to the bath bomb and helps bind all the ingredients together. Lastly, cream of tartar helps to improve the bath bomb’s longevity by preventing it from becoming too brittle.
Necessary Tools and Equipment
In addition to the ingredients, you will need some tools and equipment to successfully make aromatherapy bath bombs.
- Mixing Bowl: Choose a large stainless-steel or glass mixing bowl that allows room for thorough mixing without spilling over.
- Whisk or Fork: Use a whisk or fork to combine all the dry ingredients evenly.
- Molds: Select molds in your desired shape to mold the bath bomb mixture into. Popular options include round molds or heart-shaped molds.
- Spray Bottle: Fill a spray bottle with water to moisten the mixture gradually while mixing until it reaches the right consistency.
- Protective Gloves: It’s recommended to wear gloves while mixing and shaping the bath bombs to prevent any potential skin irritation from essential oils.
Having these ingredients and tools ready before you begin making your aromatherapy bath bombs ensures a smooth process during preparation. Once everything is prepared, you are ready to move on to step-by-step instructions for creating your own aromatic bathing experience.
Step-by-Step Instructions
To create aromatherapy bath bombs, the first step is to prepare the dry mixture. This section will provide detailed instructions on how to combine and mix the dry ingredients in the correct proportions, as well as tips for maintaining consistency and avoiding clumps in the mixture.
Before getting started, gather all the necessary ingredients: baking soda, citric acid, cornstarch or arrowroot powder, and Epsom salts. These ingredients work together to create the fizzing effect and softening properties of bath bombs. It’s important to measure these ingredients accurately to achieve the desired results.
| Ingredient | Measurement |
|---|---|
| Baking soda | 1 cup |
| Citric acid | 1/2 cup |
| Cornstarch or arrowroot powder | 1/2 cup |
| Epsom salts | 1/2 cup |
Once you have all your dry ingredients measured out, it’s time to mix them together. Start by combining the baking soda, citric acid, cornstarch or arrowroot powder, and Epsom salts in a large mixing bowl. Use a whisk or a fork to thoroughly blend all the dry ingredients together until they are evenly distributed.
It’s crucial to break down any clumps that may have formed during storage or transportation. To ensure a smooth mixture, push any lumps against the side of the bowl with your whisk or use your fingers to crumble them apart.
Importantly also is that you want to maintain the consistency of the mixture. It should be similar to wet sand, with the ability to hold its shape when squeezed together. If it appears too dry or powdery, add a small amount of water, witch hazel or oil (such as almond oil or coconut oil) a few drops at a time, and mix thoroughly until the desired consistency is achieved.
Preparing the dry mixture is an essential step in making aromatherapy bath bombs. Taking the time to measure and blend the ingredients accurately will ensure that your bath bombs turn out perfect every time. Once you have successfully prepared the dry mixture, it’s time to move on to adding the aromatherapy element by selecting essential oils for your bath bombs.
Adding the Aromatherapy Element
When it comes to creating aromatherapy bath bombs, selecting the right essential oils is crucial to achieve the desired therapeutic effects and aroma. Essential oils not only provide a pleasant fragrance but also offer various health benefits that can enhance your bathing experience. Here are some popular essential oils commonly used in aromatherapy bath bombs:
- Lavender: Known for its calming properties, lavender essential oil helps reduce stress and promote relaxation. It can aid in relieving anxiety, improving sleep quality, and soothing tired muscles.
- Eucalyptus: If you’re looking for an invigorating and refreshing fragrance, eucalyptus essential oil is a great choice. It has antiseptic and decongestant properties, making it ideal for relieving respiratory issues and clearing nasal passages.
- Chamomile: Often associated with relaxation and calmness, chamomile essential oil is perfect for unwinding after a long day. It can soothe skin irritations and promote better sleep quality.
- Peppermint: With its cooling sensation, peppermint essential oil is known to uplift moods and provide natural pain relief. It can help alleviate headaches, improve focus, and soothe sore muscles.
When selecting essential oils for your bath bombs, consider your personal preferences as well as any specific health concerns or desired benefits you may have. It’s also important to choose high-quality oils from reputable sources to ensure safety and effectiveness.
To incorporate these essential oils into your bath bomb mixture, follow these steps:
- After combining the dry ingredients according to the previous step-by-step instructions, add about 20-25 drops of your chosen essential oil(s) to the mixture.
- Use a whisk or gloved hands to thoroughly mix the oils into the dry ingredients.
- Take care not to add too much oil at once; start with a small amount and gradually increase it to achieve your desired scent strength.
- Mix the mixture thoroughly until the oils are evenly distributed to avoid concentrated pockets of oil in your bath bomb.
Remember that essential oils are highly concentrated, so a little goes a long way. Start with a conservative amount, and you can always add more if needed. Experiment with different combinations of essential oils to create unique aromatherapy experiences tailored to your preferences.
Next up, we’ll explore how to shape and mold your bath bombs for visually appealing results.
Integrating the Essential Oils into the Bath Bomb Mixture
Aromatherapy bath bombs rely on essential oils to provide their therapeutic benefits and delightful scents. In this section, we will guide you step-by-step on how to properly add essential oils to the dry mixture, ensuring an even distribution and optimal scent strength.
Selecting the Right Essential Oil
Before incorporating essential oils into your bath bomb mixture, it is important to choose the right oil for your desired aromatherapy experience. There are a variety of essential oils available, each with its own unique properties and benefits. Lavender is known for its calming effects, perfect for relaxation and relieving stress. Eucalyptus offers a refreshing and invigorating aroma that can help clear congestion and improve mental clarity. Chamomile promotes tranquility and aids in reducing anxiety.
Consider experimenting with different combinations of essential oils to create custom blends that suit your preferences. For example, combining lavender and chamomile can create a soothing blend ideal for bedtime relaxation. It’s important to note that certain essential oils may have specific safety considerations or contraindications, so be sure to research before choosing an oil.
Incorporating Essential Oils Properly
Once you have selected your desired essential oil(s), it’s time to mix them into the bath bomb mixture. Start by adding a few drops of essential oil(s) directly onto the dry mixture in the mixing bowl. The number of drops will depend on personal preference and the strength of the scent you desire. Remember that some essential oils have stronger aromas compared to others, so adjust accordingly.
To evenly distribute the oil throughout the mixture, use a whisk or spoon to gently mix and incorporate it thoroughly. As you mix, take note of any clumps forming-break them apart with your fingers or press them against the side of the bowl until they are fully incorporated. This will ensure a consistent scent and experience when using the bath bomb.
Be mindful not to add too much oil, as excessive amounts can hinder the bath bomb’s ability to fizz in the water. Gradually add the essential oil(s) while monitoring the mixture’s texture and moisture. You want it to be moldable but not too wet or sticky.
By following these steps, you can successfully integrate essential oils into your bath bomb mixture, resulting in a delightful aromatherapy experience that is both relaxing and invigorating. In the next section, we will discuss different mold options for shaping your bath bombs creatively.
Shaping and Mold Choices
When it comes to making aromatherapy bath bombs, the shaping and mold choices can add an extra touch of creativity and fun to the experience. While traditional round molds are commonly used, there are a variety of options available that can make your bath bombs stand out. Whether you prefer heart-shaped, star-shaped, or even animal-shaped molds, the possibilities are endless.
To properly shape and pack the mixture into molds for desired results, it is important to follow a few guidelines. Firstly, make sure to tightly pack the mixture into the chosen mold to ensure it holds its shape after drying. Use your hands or a small spoon to press the mixture into all corners of the mold. Avoid leaving any gaps or air pockets as this can cause the bath bomb to crumble or disintegrate.
Additionally, consider using different layers of colors and scents in your bath bombs for added visual appeal. For example, you could create a two-tone effect by dividing the mixture in half and coloring each half with different shades using natural colorants such as beetroot powder or matcha powder. Layering these colored mixtures in your mold before packing them tightly will result in beautifully layered bath bombs once they are dry.
To provide readers with a clear understanding of how to properly shape and pack their bath bomb mixture into molds, here is a step-by-step guide:
- Select your desired mold – round, heart-shaped, star-shaped, etc.
- Prepare your bath bomb mixture according to previous instructions.
- Divide the mixture if you want to create multicolored layers.
- If adding dried flowers or other decorative elements, place them at the bottom of one half of the mold.
- Pack one half of the mold tightly with the first layer of colored mixture followed by pressing down any additional layers if desired.
- Repeat step 5 for the other half of the mold.
- Press the two halves of the mold together firmly and hold for a few seconds to ensure they stick together.
- Carefully remove the bath bomb from the mold and place it on a flat surface to dry.
By following these guidelines, readers can explore their creativity and create unique bath bombs that are not only soothing to the senses but also visually appealing.
| Shaping and Mold Choices | Tips |
|---|---|
| Choose different mold shapes | – Heart-shaped, star-shaped, etc. |
| Pack mixture tightly | – Avoid gaps or air pockets |
| Create layered effect | – Use different colors and scents within the same bath bomb |
Drying and Setting the Bath Bombs
After the bath bombs have been carefully shaped and molded, the next step is to allow them to dry and set. This is an important part of the process as it ensures that the bath bombs retain their shape and fizz effectively when used in the bath. Here are some tips for drying and setting your aromatherapy bath bombs.
- Optimal Drying Times: It is recommended to let your bath bombs dry for at least 24-48 hours before using them. This allows them to harden completely and ensures that they won’t crumble or break apart when dropped into the water. Keep in mind that the drying time may vary depending on factors such as humidity levels. If you live in a humid climate, it may take longer for your bath bombs to dry.
- Proper Storage: While drying, it’s important to store your bath bombs in a cool, dry place away from any moisture or humidity. Avoid placing them near windows or areas where they may be exposed to direct sunlight, as this can cause them to lose their shape or fade in color.
- Prevention of Cracks or Disintegration: To prevent cracking or disintegration during the drying process, handle your bath bombs with care and avoid moving them too much while they are still wet. Any sudden movements or jostling can cause them to lose their shape or crack. If you notice any cracks forming on your bath bombs while they are drying, gently press the mixture back together before it has completely hardened.
Remember, patience is key during this stage of the process. Allowing sufficient time for your bath bombs to dry will result in better quality products that hold their shape and fizz when used. Once dried and set, you can proceed to store your aromatherapy bath bombs in an airtight container until you’re ready to use them.
By following these tips for drying and setting your aromatherapy bath bombs, you can ensure that each one is ready to deliver a delightful and luxurious bathing experience.
Making It Extra Special
Adding unique elements to bath bombs can take your aromatherapy experience to the next level and make it even more enjoyable. By incorporating additional elements such as dried flowers, colorants, or glitter, you can enhance the aesthetic appeal of your bath bombs and create a truly personalized bathing experience.
One creative idea is to add dried flowers to your bath bombs. Dried lavender, rose petals, or chamomile can provide a beautiful visual element as well as extra fragrance. Simply add a small handful of dried flowers to your mixture before shaping the bath bombs. Not only will they look stunning in the water when the bath bomb is dissolved, but they will also release their natural scents for an added sensory experience.
Another way to make your bath bombs visually appealing is by adding colorants. You can use natural dye sources such as beetroot powder for a soft pink hue or spirulina powder for a calming green color. Add a small amount of the desired colorant to the dry mixture and blend well before adding other ingredients. Be cautious not to use too much colorant as it may stain your bathtub.
For those who enjoy a touch of sparkle, adding glitter is a fun option. Biodegradable glitter is available in various colors and sizes and can be mixed into the dry mixture before shaping your bath bombs. When they dissolve in water, these glittery bath bombs create a magical experience that adds an extra dose of luxury and indulgence.
When incorporating these additional elements into your bath bombs, it’s essential to consider how they will interact with essential oils and other ingredients. Make sure not to compromise the effectiveness or integrity of your aromatherapy bath bombs by overwhelming them with too many additives.
Enjoying the Aromatherapy Bath Bombs
As you prepare to enjoy your homemade aromatherapy bath bombs, it’s important to set the mood and create a truly indulgent bathing experience. Start by ensuring that your bathroom is clean and clutter-free, creating a serene and relaxing environment. Dimming the lights or lighting some candles can also help to create a calming ambiance.
Before getting into the tub, it’s advisable to fill it with warm water. The ideal temperature for an aromatherapy bath is around 95-100 degrees Fahrenheit (35-38 degrees Celsius). This warmth helps to relax muscles and open up the pores of your skin, allowing the essential oils in the bath bomb to be more easily absorbed and provide their therapeutic benefits.
Once you’ve prepared your bath and are ready to relax, gently place one of your homemade aromatherapy bath bombs into the water. Watch as it fizzes and releases its delightful scents into the air. Take a moment to inhale deeply and allow yourself to fully experience the aroma of the essential oils.
As you soak in your fragrant bath, consider playing some calming music or using nature sounds in the background. This can enhance relaxation and help quiet any mental chatter, allowing you to fully unwind. It’s also important to give yourself enough time for a leisurely soak – aim for at least 20 minutes or more if possible.
After enjoying your aromatherapy bath, be sure to rinse off any excess oil from your body with warm water before drying off with a soft towel. This will help prevent any post-bath residue on your skin.
Remember, self-care is an important part of overall well-being, so take this opportunity to pamper yourself with an indulgent bath using your homemade aromatherapy bath bombs. Not only will you benefit from the therapeutic properties of essential oils but also from taking time for self-care and relaxation.
Conclusion
In conclusion, making aromatherapy bath bombs is a wonderful way to enhance your bathing experience and indulge in self-care. By combining the benefits of essential oils with the soothing effects of a warm bath, you can create a truly therapeutic and relaxing experience for yourself.
Throughout this article, we have discussed the basic ingredients and tools needed, provided step-by-step instructions on how to make the bath bombs, and explored various ways to add unique elements for aesthetic appeal.
One of the most exciting aspects of creating your own aromatherapy bath bombs is the opportunity to experiment with different essential oil combinations. Each essential oil has its own distinct benefits and aroma, allowing you to tailor your bathing experience to meet your specific needs. Whether you choose calming lavender for stress relief or invigorating eucalyptus for respiratory support, there are countless possibilities for creating different aromatherapy combinations.
Exploring different essential oil combinations not only adds variety to your bathing routine but also allows you to discover what works best for you personally. You may find certain combinations that promote relaxation and better sleep, while others may uplift your mood or soothe sore muscles. The key is to listen to your body and pay attention to how each aroma affects your overall well-being.
Ultimately, making aromatherapy bath bombs is a fun and creative way to prioritize self-care and enhance your daily routine. With just a few simple ingredients and tools, you can create luxurious bath time experiences that promote relaxation, rejuvenation, and overall wellness. So go ahead and start experimenting with different essential oil combinations – you might be surprised at how much it elevates your bathing experience.
Frequently Asked Questions
How do you make essential oil bath bombs?
To make essential oil bath bombs, you will need a few key ingredients. Start by mixing together baking soda, cornstarch, and citric acid in a bowl. In a separate small container, combine your preferred essential oils with a carrier oil such as almond or coconut oil. Slowly add this mixture into the dry ingredients while stirring continuously to avoid any fizzing.
The consistency should resemble wet sand and easily hold its shape when squeezed together. Once you achieve the desired texture, firmly pack the mixture into bath bomb molds and allow them to dry for at least 24 hours before carefully removing them from the molds. Finally, store your homemade essential oil bath bombs in an airtight container until ready to use.
How do you make scented bath bombs at home?
Making scented bath bombs at home is a fun and creative process that allows customization according to personal preferences. Begin by combining baking soda, Epsom salt, cornstarch, and citric acid in a large bowl. Thoroughly mix these dry ingredients until well combined. Next, add your choice of fragrance oil or essential oils along with a liquid moisturizer such as almond oil or witch hazel to create a slightly damp texture.
Mix these wet ingredients into the dry mixture gradually until the consistency resembles damp sand that clumps together when squeezed tightly in your hand. Firmly press this mixture into bath bomb molds and let it sit for around 24 hours to dry completely before removing from the molds. Remember to handle them gently when transferring them into an airtight container for storage.
Can you put essential oils in bath bombs?
Yes, you can certainly put essential oils in bath bombs! Essential oils are commonly used in bath bombs to add fragrance and provide potential therapeutic benefits during bathing experiences. When crafting homemade bath bombs, incorporating essential oils is as simple as adding them into the recipe during the wet ingredient mixing stage before forming the mixture into molds.
However, it’s important to be cautious with the amount of essential oils used as some can be strong and overwhelming when applied directly to the skin. It’s advisable to use 10-20 drops per bath bomb or adjust according to personal preference and the strength of the oil being used. Experimenting with different essential oil combinations can create a delightful aromatherapy experience while enjoying a relaxing bath.

Are you looking for a natural way to improve your health and wellbeing?
If so, aromatherapy may be the answer for you.
